
Seascape photography is a kind of landscape photography where one of the main subjects is the sea or the ocean. The main difference is the ever-moving water, which influences your picture and your settings.
In this article, we’ll give you 15 seascape photography tips to help you overcome the challenges of this amazing niche.

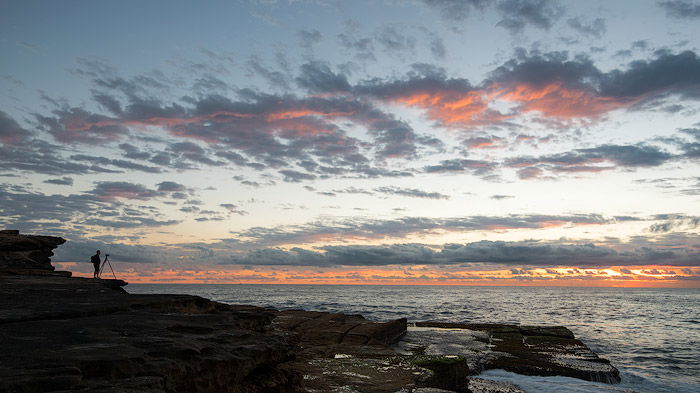
15. Seascape Photography: Always Play it Safe With the Sea
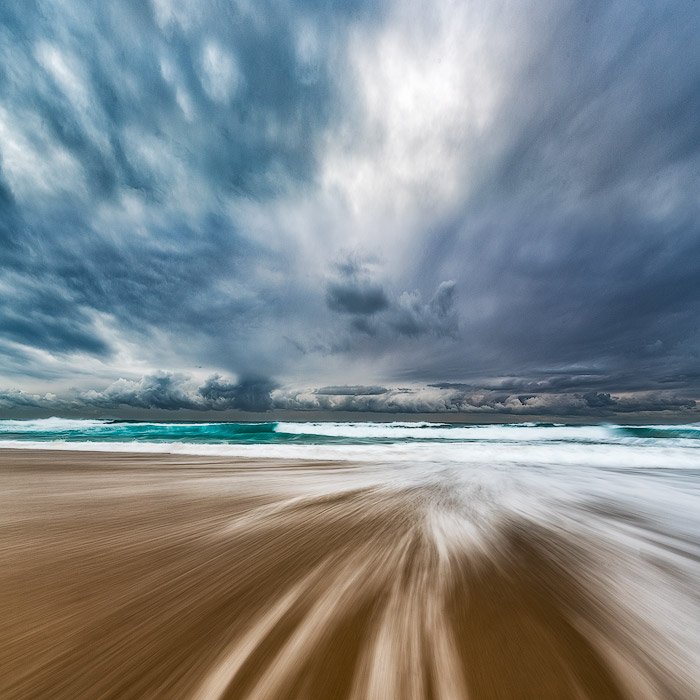
Safety should be the number one advice for a seascape photographer. People starting out with this genre tend to underestimate what the ocean can do.
You should take safety very seriously. Pay attention to your surroundings at all times. No photo is worth your life.
Key Safety Tips
- Always keep an eye on the ocean, do not turn your back on it.
- Don’t forget rogue waves. These are huge waves that can all of a sudden hit the coast. Always have a safe way to retreat.
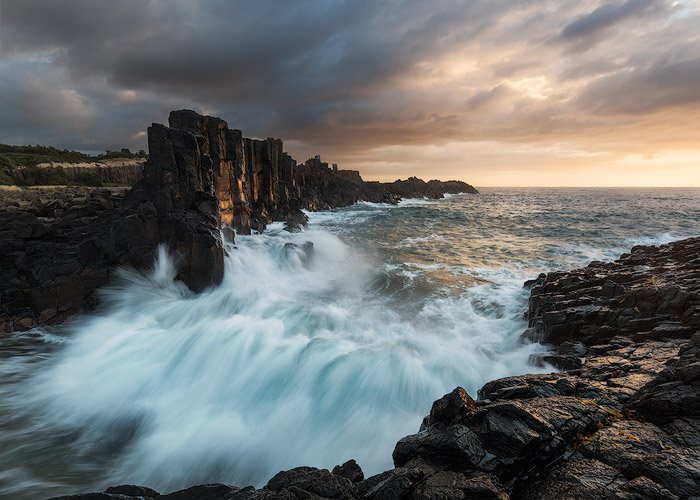
- Do not go near the edge, where the waves crash. This piece of advice is the most important one. A big wave can easily knock you down and pull you into the sea.
- Some of the algae are very slippery.
- Check swell and tide before shooting seascape photography. This way, you’ll know if the sea is going to retreat or not. This info can prevent you from being stuck on some rock in the middle of raging waves.
- Spend 5 minutes looking at the ocean before proceeding. You’ll have an idea of where the waves can reach and where it’s safe to stand. Dry rocks typically mean it’s safe.
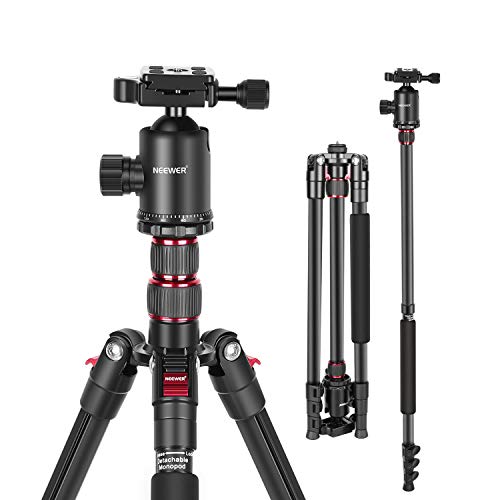
14. Use a Sturdy Tripod
A good tripod is essential for sea-focused photography. It must be sturdy enough to hold your camera stable when the waves hit it.
But I see zero reasons to buy expensive tripods. The seaside environment is very aggressive and tends to break things. It takes time to find a good tripod that won’t fail you, but it’s worth the search.
I have used more expensive tripods like Manfrotto. But its lifespan wasn’t any different to the cheaper tripods. These days I use Weifeng tripods with clamps.
They are just as stable and heavy-duty as more expensive ones. And because of the price, I can change the tripod without regrets after around half a year.
You can try other manufacturers too. But don’t choose the one with ultra-thin legs or too many extenders.
Tips for Using a Tripod
- If it gets hit by a wave, rinse it with the freshwater.
- While shooting on the beach, dip it into the sand about 10-20 cm. This will increase its shake resistance and stability.
- You still need to hold it while in the middle of the rushing water.
- Use WD-40 to fix stiff joints.
- I don’t see the point in disassembling a tripod to clean it. Too much hassle. That’s why I prefer cheaper ones to change them later.
- Put your backpack on the hook to make the tripod heavier and more stable.
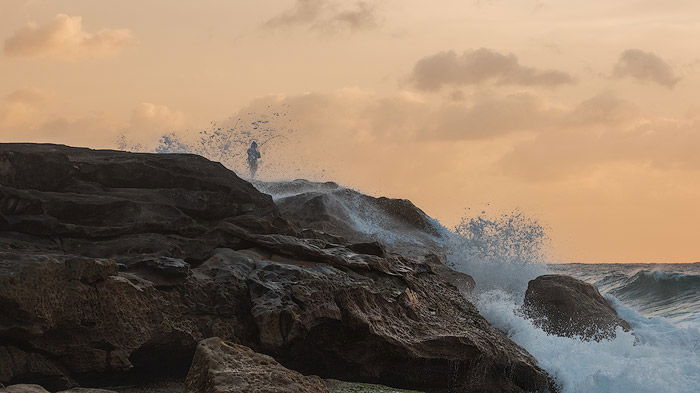
13. Don’t Be Afraid of Getting Wet
If you want to create good seascape images, you need to get wet. This means that you need to be close to the action to capture water in all its beauty and power.
On the beach, you have to stand up to knee-deep in the water (don’t go deeper). On the cliffs, you’ll be hit by the waves. That’s normal, that’s the price we have to pay for the photos.
That’s why you need to have a spare set of clothes somewhere in a dry place. Backpacks are good at resisting water so that you can keep your stuff there.
Also, dry clothes are good for wiping water out of your camera.
I often use crocs for seaside photos, others use flip-flops. I’ve seen people using tall fishing boots or even fishing overalls. It’s up to you and where you are.
If you’re shooting off the Icelandic coast, you might want to skip the flip-flops and go for some boots.
12. Know the Tide and Swell
The weather forecast is essential for any landscape photography. But in the case of seascapes, you need to add tide and swell into the equation. This information is crucial for planning and actions in-field.
Every location has different land features. This means that some areas will only work in low tide. For instance, the rock platform near the Hornby Lighthouse in New South Wales, Australia, is only accessible during that period.
On the contrary, Bombo Quarry works best during the high tide. During the low tide, it has too many rocks and nothing to compensate.
Some spots work well during both low and high tide. But they might provide the best experience only during the large swell (big waves). You need to know the area in advance to make decisions.
You can also ask a local photographer or read a photography guide for that exact location.
The other important factor is to know the tendency. Even if you can stand on the rock the minute you arrive, it doesn’t mean it’ll be safe in 20 minutes as the tide may be rising.
The important thing about the swell is to know that waves become much bigger during sunrise when the Sun has just appeared.
11. Maximize Depth of Field
Let’s talk about camera settings. Depth of field is one of the most important technical parameters of the photo. For a landscape and all of its sub-genres, it should cover the whole area of the picture.
Depth of field correlates with the f-number and the focal length. To have a photo in focus everywhere, you need at least f/8. Lenses often have the best performance at f/11 – f/13. Some of them at f/16, which is the smallest aperture you can use.
Smaller apertures (bigger f-numbers) will produce blurred images due to the diffraction.
Many internet resources say that you should calculate the hyperfocal range and focus there. But in my experience, that’s overkill. Just focus anywhere around 1/3 into the frame, and that’ll do.

Some facts about aperture:
- f/8 is usually enough for a wide-angle lens. Try to avoid diffraction effect which can ruin your shot.
- f/5.6 should be enough when there are no objects in the foreground, and all of them are at infinity, i.e., more than 3 metres away.
- You need a smaller aperture for longer focal length, i.e., when you zoom in, increase your f-number. For instance, f/8 zoomed in on the wave will blur the background.
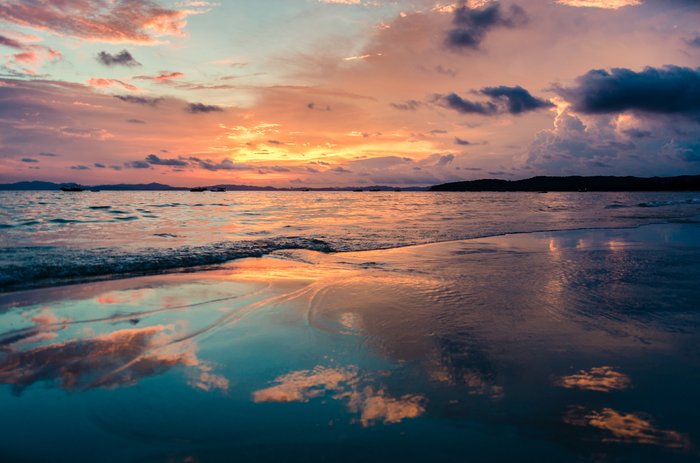
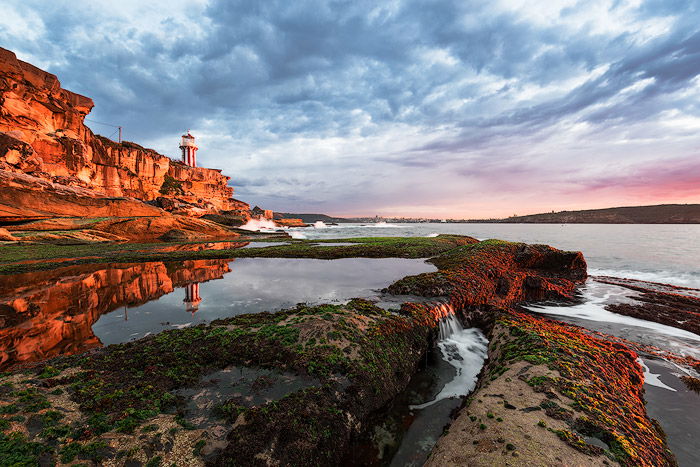
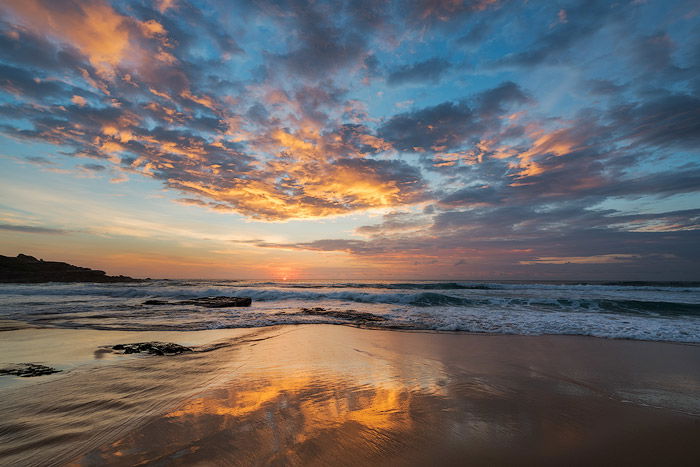
10. Use Reflections in Your Shot
Reflections provide some of the best photography opportunities. They can save or make a shot.
It is not always obvious where to get reflections for seaside photography. But I can assure you, there are many of them.
Here are some easy to use seascape photography reflective surfaces:
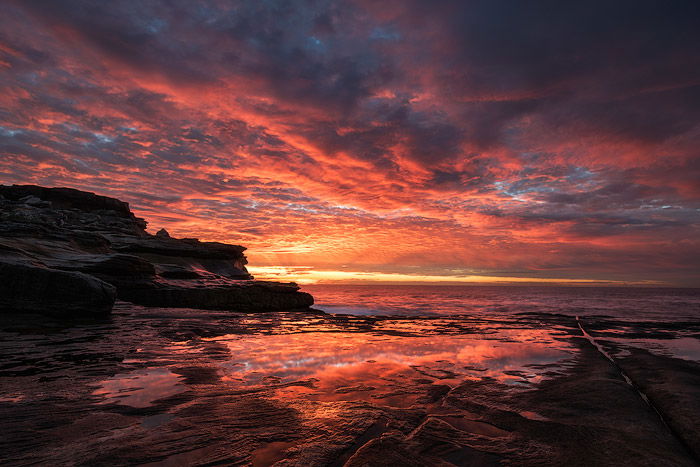
1. Rockpool during low tide. When the waves cannot hit the pool or do so rarely, it has enough time to become still and reflect all of the skies.
2. Puddles on the rocks and rock platforms. Such pools need a lot of time to dry. Go to the rocky area after rain or after a storm. You’ll find plenty of possibilities to capture the reflections.

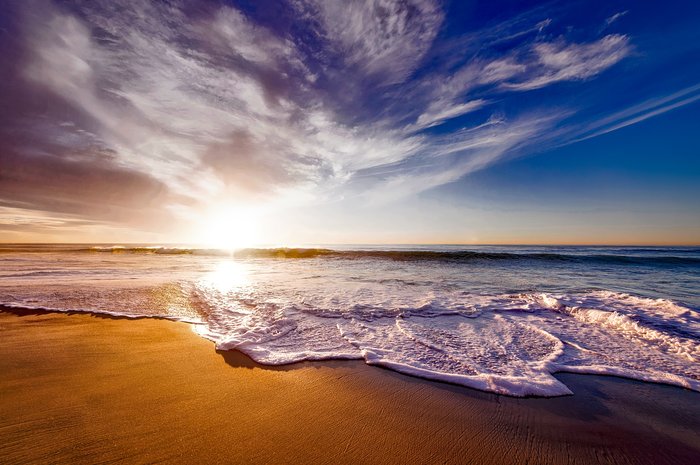
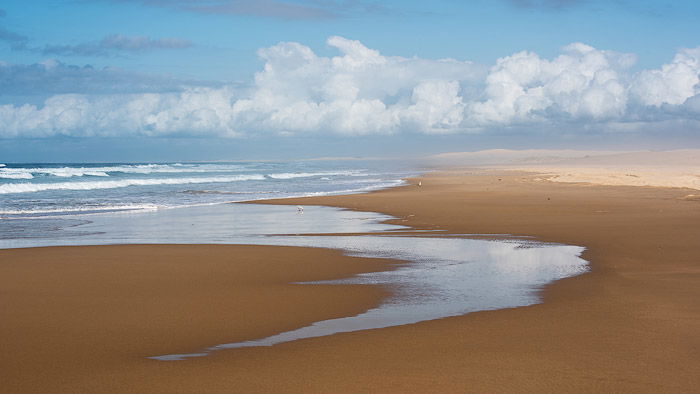
3. Sand beach. During the low tide, you can go to the beach and capture reflections on the sand. After the wave slowly recedes, it takes more time for the thin layer of water to dissolve. You can use those couple of seconds to build your composition.
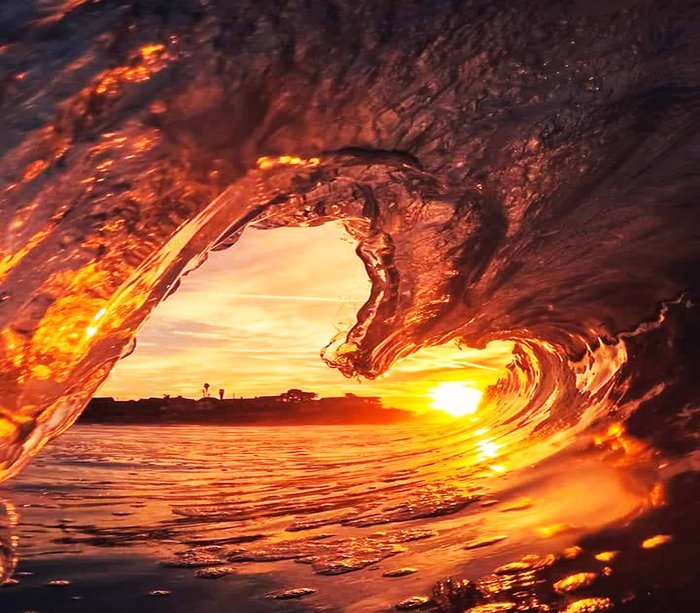
4. Wet rocks produce fantastic orange glares during sunrise or sunset. Adjust your camera to find the angle with the best shiny effect.
9. Use the Right Shutter Speed
Seascape photography is all about water. In a regular landscape shot, the shutter speed affects the sky the most. The trees, fields, and mountains stay where they are.
It’s all different for seascape photography. The waves move pretty fast, and the water keeps shifting. You need to learn how to photograph water and how shutter speed affects it to master seascape photography.
The first question my students ask is about the right camera settings. While it’s quite easy to explain the proper aperture, it is not that easy for shutter speed.
That’s because there are no right or wrong seascape photography settings as long as the photo is not over- or underexposed. The correct settings depend on the actual scene you are trying to capture and the desired effect.
Ultra-long exposures will smooth the water entirely. You can use an ND filter to reach the desired exposure.
Use ultra-short exposures to freeze a crashing wave.
A few second-exposure will create foam trails on a receding wave.
Half a second will smooth some of the details. But it keeps all the texture and character of the water.
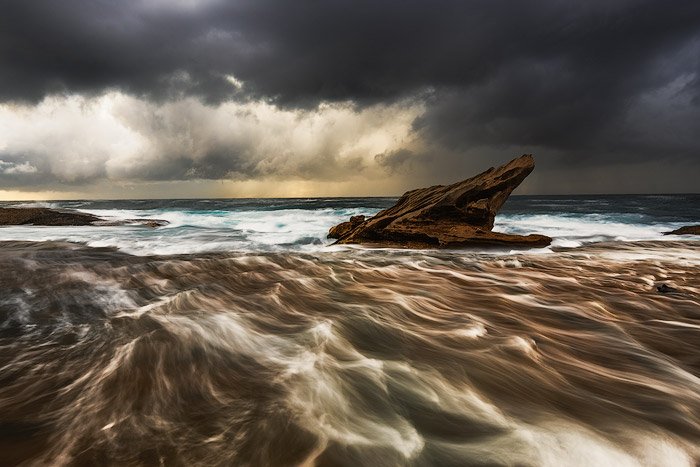
8. Use the Waves for Better Composition
You might have heard about leading lines, golden ratio, diagonals and other composition techniques. With seascape photography, we have the advantage of creating compositions out of nowhere.
All you need to do is see what the ocean is doing. Learn how the waves are moving and include one of the waves into your shot.
You need to take a position, set up your gear and wait for the perfect leading line to come into your seaside image.
You can include the wave itself as a significant line or the traces it leaves on the sand. Also, the whole area in the photo can serve as a composition element, and that also works for the water.
Sometimes, you will need to burst several shots and then pick the best one. Water is often too fast and unstable to make only one single successful shot of the ocean.
7. Bring a Microfiber Cloth
This one is tiny yet essential advice. It is often windy by the sea and when the big waves crash, the wind throws water particles at your lens. Not to mention if the wave hits you.
You need to wipe the water out to continue shooting. In general, you have to keep your lens clean at all times. And you can’t just use your sleeve if your clothes are soaking wet.
You need to keep a bunch of microfiber cloth pieces in the safety of your backpack. Have it easily accessible because time is running fast for seascapes.
I have a bunch in the bag and one in my pocket for quick use.
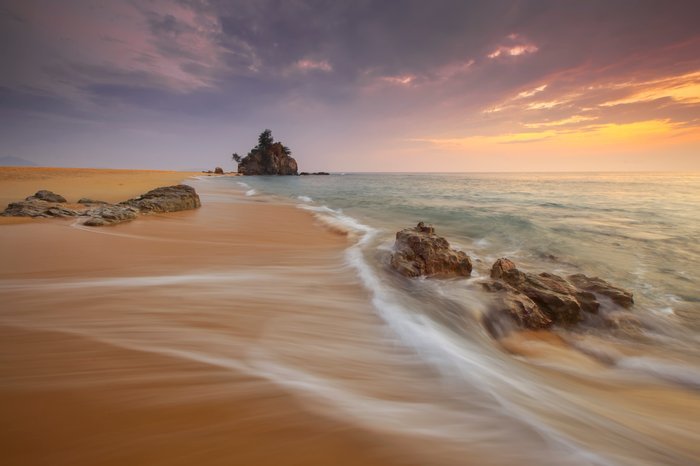
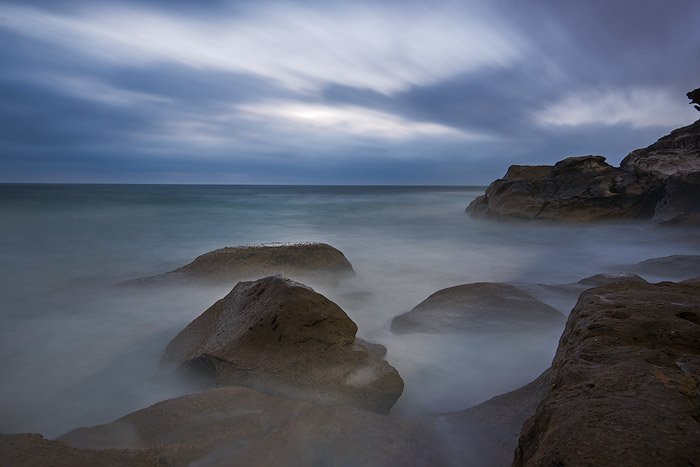
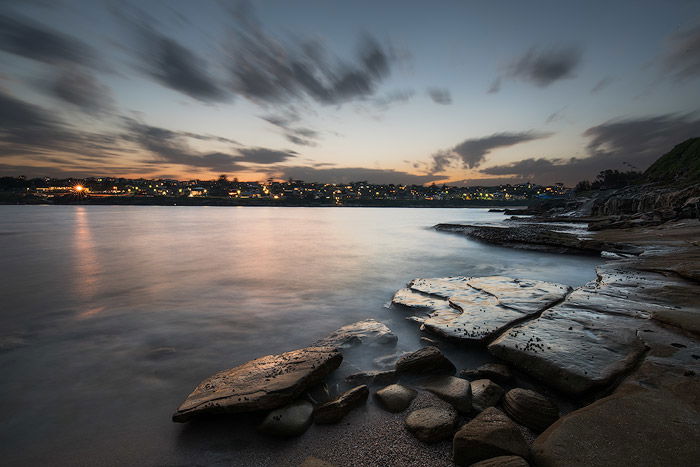
6. Use Long Exposures to Smooth the Water
Shooting at sea level provides numerous opportunities using all sorts of foregrounds and action in the water. One thing you can do is long exposures, which smooth the water. The amount of smoothing depends on how long the exposure is.
The typical seascape shot includes some solid foreground, like rocks, some water action in the middle ground and a moody sky. Sometimes photographers use water as both foreground and middle ground.
An ultra-long exposure (30+ seconds) smooths the water entirely. If the sea is restless, turns it foggy. It’s up to you to decide whether you like this or not. But most of the times you need to also use an ND filter.
If the water is quite calm, then it turns into a level shiny surface, which looks pretty good. The additional bonus is the blurred movement of the clouds transforming into some trails.
An exposure that is 10 seconds long provides some basic textures created by the foam movement and is not as even. It shows impressive patterns, which are different with every photo.

Shorter exposures starting from 2 seconds and all the way to half a second are perfect for seascape photographers.
These shutter speeds create the most dramatic and dynamic effects in the water, while still smoothing it and removing the busy and shattered look.
Anything faster than 1/15 creates a shattered splashy look and you can use it to shoot incoming waves.
But to completely freeze the wave you’ll need 1/250 or faster.
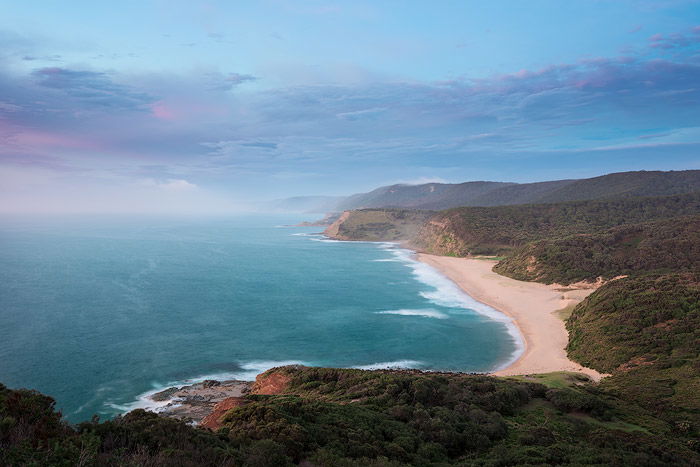
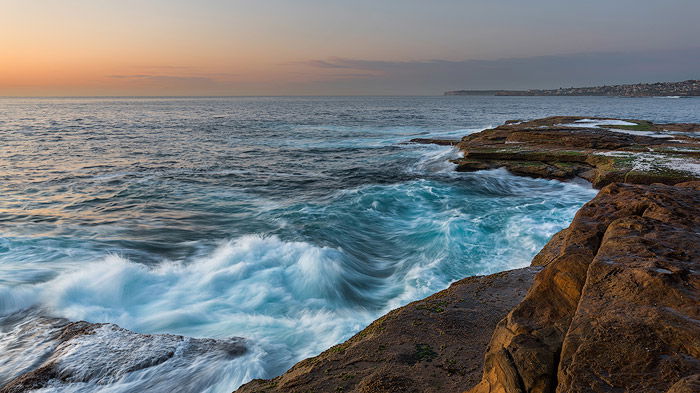
5. Shoot from a Cliff-Top
Cliff-top vistas offer a different world. Even the longest exposure won’t turn the water into the fog. And I prefer going up while it’s still too dark.
The 30+ second-exposures smooth and blur water surface, and make it even. Combined with the sharp leading lines provided by cliff edges, it creates a surreal look and feel. Such photos have a taste of Eternity in them.
When the light is brighter, I prefer to go down to sea level. All the water patterns from cliff height make the photo too busy.
It is a different story when you have massive crashing waves right beneath your position. Also, during the day a higher position provides much better colors. And the patterns are no longer distracting.
In these cases, it’s safe to photograph from the cliffs. In fact, daytime ocean color is one of the best photographic opportunities you can get.
At a higher elevation, the water surface isn’t as reflective, so you get better colors.
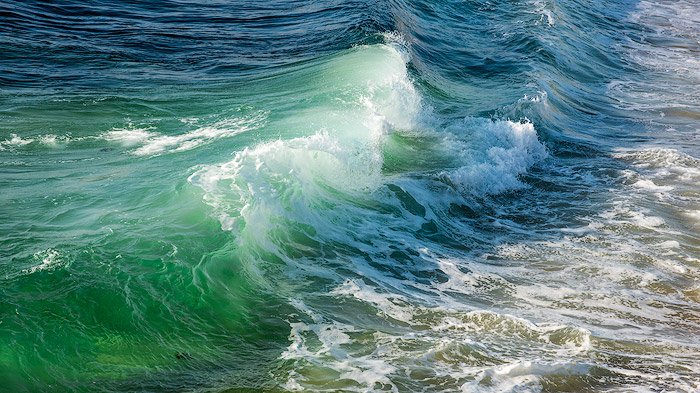
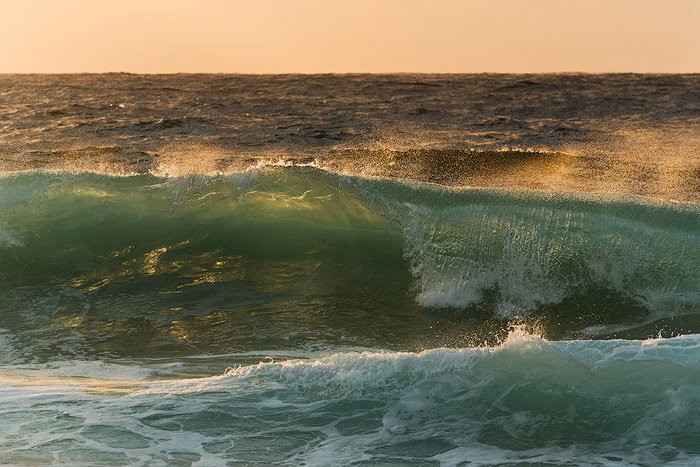
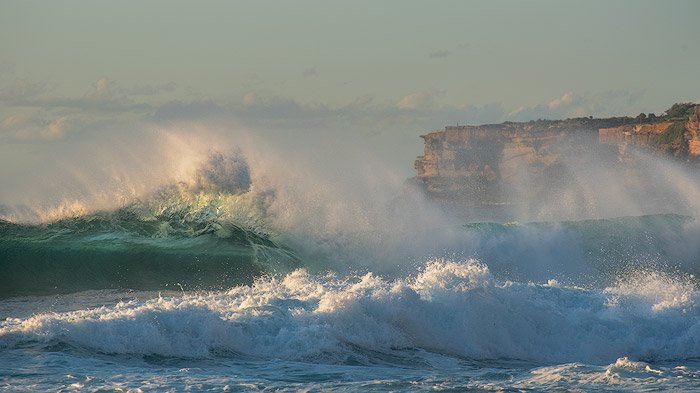
4. Use the Waves as the Main Subject
Another great opportunity is to capture the waves as the main subject. You need some sort of longer lens to zoom in.
There are two ways to photograph the waves: standing on the beach or swimming next to them. The latter requires some specialized equipment, which is not cheap. Also, it requires a certain level of fitness.
The former one is easier. You only need a telephoto lens. To freeze the wave, use a shutter speed of 1/250 or faster. This value may be different depending on the angle the wave is going at.
You can’t go wrong with 1/800 – 1/1000 for any angle.
There is a more sophisticated technique, where you take a longer exposure, like 1/10 of a second. In this case, the wave looks like an explosion or a burst. And it also adds drama and menace to the photo.
Please note, the depth of field decreases with zoom so that f/8 will blur the background too. In case you want everything in focus, go f/16. Or go f/5.6 to blur the background even more.
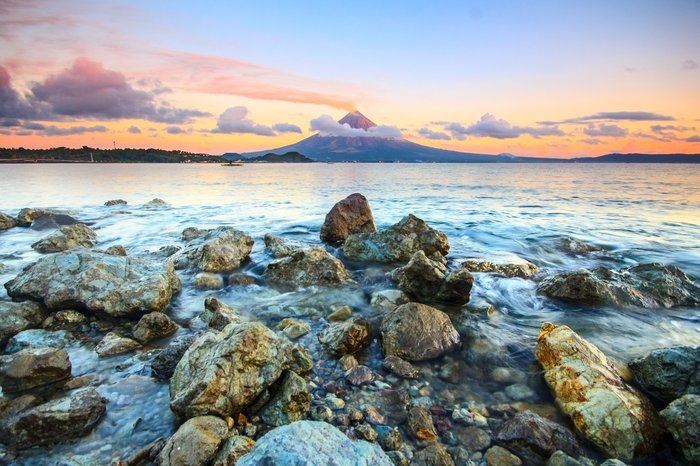
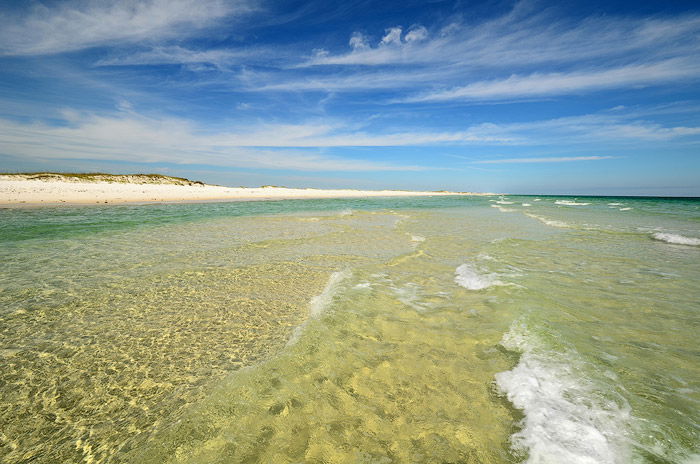
3. Select an Interesting Foreground
Seascape photography is very diverse when it comes to the foreground selection. Similar to the regular landscape, you can pick the rocks, the plants, the cliffs, puddles, or any solid objects.
But in addition to that, you can also try the action in the water. Depending on the environment, it is possible to create multiple appealing subjects.
Shutter speed manipulations can create:
1. Streaks of flowing water. Use 1/4 – 5 seconds for the receding wave. With a strong current, the shot can work out with the shorter shutter speed of 1/4 – 1/2 sec. If the flow is huge and powerful, 2-5 seconds will also work. But I prefer shorter exposures because they keep more of the texture. In general, I wouldn’t go above 2 seconds.
2. Little waterfalls. When the wave is rolling over some rock, it creates multiple beautiful waterfalls. The best shutter speed is 1 second and higher.
3. Sand reflections. You need a flat and even sandy beach for this one. If the water recedes slowly, it leaves some fantastic reflections behind. This effect works well for the sunrise or sunset.
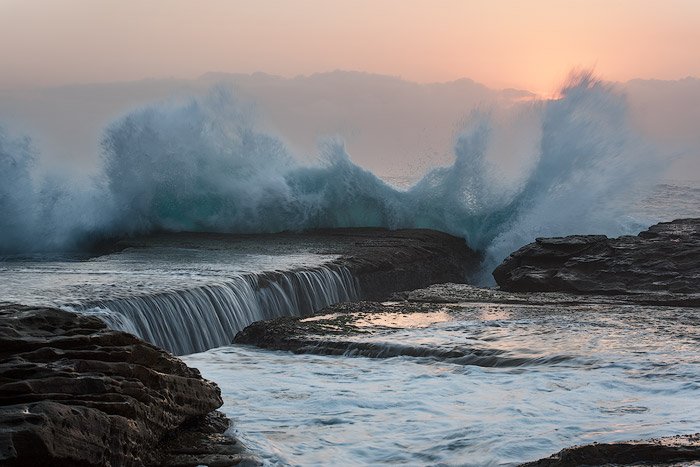
4. Restless sea. The sea boils and topples near the rocks and rock platforms, crashing against them and rolling back. These areas provide an amazing opportunity to show the character and power of the sea. Use shorter exposures here, 1/8 – 1/2 at max.
5. The waves. I have already mentioned these, but again – they make up a significant part of seascape photography. Use 1/10 – 1/3 to fix the waves without freezing them. They’ll keep the shape without a busy look. The waves look best with backlighting when the sun shines through them. Even when the sun is higher in the sky and not in the frame.
6. Colors. The color of the water depends on the depth and can show some spectacular effects. It works well for the foreground too.
2. Shoot at Different Times of Day
The standard approach is to shoot around sunrise and sunset. This is, of course, correct. With some exceptions.
The sea gets the best color when the Sun is high in the sky. This fact is especially true when you shoot from some height, like the cliff or a helicopter.
You could get some deep blue or blazing cyan depending on the seabed and water depth.
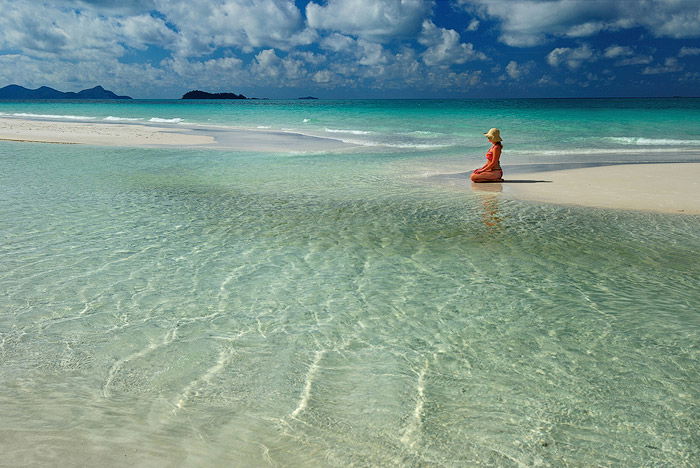
Another option to shoot during the day is to photograph the beach. Harsh, strong filling light removes all ugly shadows from the beach making it even in color and lighting. This type of photos is characteristic of paradise beaches, so don’t disregard it.
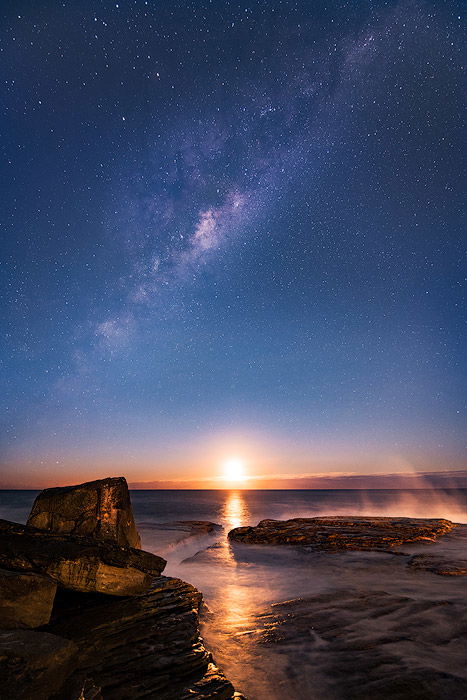
The only time that we haven’t discussed is at night. You can still use it for seascapes in combination with astrophotography. The smooth water surface together with the stars creates some of the most appealing pictures.
1. Use a Wide Range of Lenses
Again, the classic approach is to mount the widest lens and rush ahead with snapping pictures. In my experience, this can limit your creativity and photography opportunities.
Of course, the wide-angle lens is still the main choice. But other lenses can be useful too. Wide lenses exaggerate the foreground and make all distant objects much smaller than they appear to the naked eye.
But a longer lens squeezes the perspective and avoids excessive attention to the foreground. You can compose a tighter shot or photograph jumping dolphins. Or capture distant sun rays or make a wave your main subject.
Sometimes it is best to carry a versatile travel zoom lens with yourself. A 24-105mm is a perfect example of this.
Conclusion: Seascape Photography
Seascape photography is both easier and harder than regular landscape photography.
It’s easier because you have so many additional things to photograph. It’s harder because it’s never constant. It’s ever-changing, elusive, and dangerous at the same time.
No wonder so many people fall in love with the sea. Armed with these seascape photography tips, we suggest you grab your camera and tripod and give it a try. You can check our ocean photography article for more great tips. Don’t forget about safety!
Don’t miss out on our Simply Stunning Landscapes course for all the best landscape tips! Or check out Infinite Exposures to learn the secrets of long exposure photography!


