Have you ever tried iPhone macro photography? It’s virtually impossible.
If you get too close to your subject, your image ends up blurry. However, with a few simple modifications, you can quickly turn your device into the ultimate macro photography machine.
If you do it right, you can produce beautiful pictures that rival those taken with a professional camera.
Now’s the perfect time to get into macro smartphone photography. Keep reading because we have a few useful tips to help you get started.

Our Top 10 Tips For iPhone Macro Photography
10. Choose the Right Lens
Today’s smartphone cameras have improved significantly. Some of them now even include optical zoom and wide-angle lenses.
However, despite all the advances in mobile photography, most of these devices are still not capable of taking macro images.
That means your phone can’t take extreme close-ups of subjects since it can’t focus on anything that’s only a few inches away from it. To solve this problem, you have to buy a clip-on macro lens for your device.
To narrow down your choices, you first have to figure out if you can use the lens you want to buy with your phone. Manufacturers often include a list of compatible phones in their product descriptions, so this shouldn’t be an issue.
There are many lenses available on the internet and it can get overwhelming. To help you find the right lens, we’ll show you what to look for regarding design, lens type, and price.
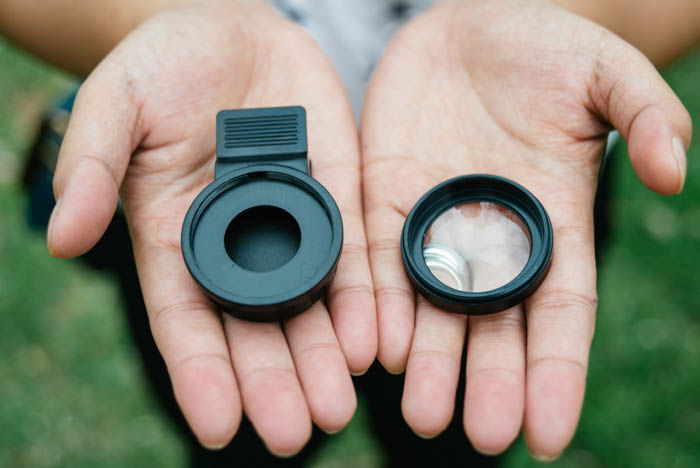
Design
There are tons of designs for lenses out there. Most of them literally look like clips with lenses (like the Mobi-lens and many other brands). Then there are ones that snap on to your phone such as the Olloclip.
The less common models are called revolver lenses, particularly the ones from Ztylus. If you’re wondering what it looks like, just think of it as a round Swiss Army knife.
It lets you pull out the lens you want and push it back in once you’re done using it.
Lens Type
Find out if a lens is made of plastic or glass. If you want to create high-quality macro shots, glass is the best choice. It may cost a bit more, but at least you know your images will look sharp.
Price
The cost varies a lot when it comes to these clip-on lenses. You can get one for less than 20 dollars, or you can splurge on a set that’s more than 100 dollars.
For the cheapest option, you can get a basic Mobi-lens set for about 12 to 15 dollars. If you have an iPhone, then the Olloclip would be a decent choice.
Their cheapest lens is about 15 dollars, and their most expensive kit (for filmmakers) is about 200 dollars. For the Ztylus revolver lens, they range from 10 dollars to 100 dollars.
Of course, there are plenty of other lenses available out there. Just consider the options above a gauge to help you figure out the price range of macro phone lenses.
Before buying, do some research, read reviews and weigh the pros and cons of each lens.
Can You Use a Lens on a Dual Camera Phone?
Since the dual camera is still a relatively new concept, their use often varies from one manufacturer to another. While some phones feature a wide-angle lens on the second camera, others have zoom.
So what does it all mean? Well, if you use a clip-on lens that’s not compatible with your phone, you may not achieve the results you want. It’s essential to buy a set of lenses specifically created for your device if you’re using a dual camera.
Thankfully, there are now also dual lenses available for many dual-camera phones. There aren’t a lot of options, and many of them are brandless products.
However, using them is still relatively safer than the non-compatible single-lens versions.
Although it’s not recommended, you can still use a regular clip-on single macro lens on a Samsung or an iPhone with a dual-camera set-up. Even when you block the second lens on these phones, the primary lens will still work normally.
As long as you don’t try to zoom in or use portrait mode, you should be able to use it without any problems.
However, the clip-on lens might cause too much pressure on the second camera and potentially damage it.
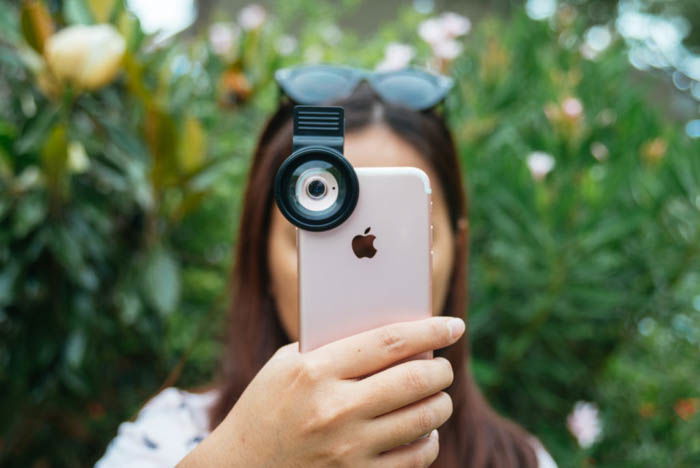
9. Attach the Lens Properly to Avoid Vignetting
When you buy your lens kit, you’ll probably notice that it doesn’t just come with a macro lens. Often, you’ll also find a fisheye and a wide-angle with the package.
Before you take any photos, make sure you’re using the macro instead of the other options.
Also, when you clip on your attachment, check if the camera lens is right in the middle. Otherwise, it might obstruct the view and you’ll see ugly vignetting.
8. Get as Close as Possible for Sharp Focus
When you’re shooting iPhone macro photography, you’ll notice that the depth of field is extremely shallow. That means only a small part of the image remains in focus.
So when you’re using a macro lens, don’t be surprised if everything looks blurry the moment you attach it to your phone. You’ll only start seeing a sharp image if you’re about a few inches away from your subject.
That’s why it’s essential that you get close to whatever you’re photographing. Otherwise, you’ll just end up with blurry pictures. Take some test shots and measure how far you have to be from your subject.
Macro lenses vary in working distance, or the required space between the lens and the object to achieve sharp focus. It can be about two inches for some or less than an inch for others.
Remember to keep a reasonably consistent distance from your subject because even a minor change could affect your focus.

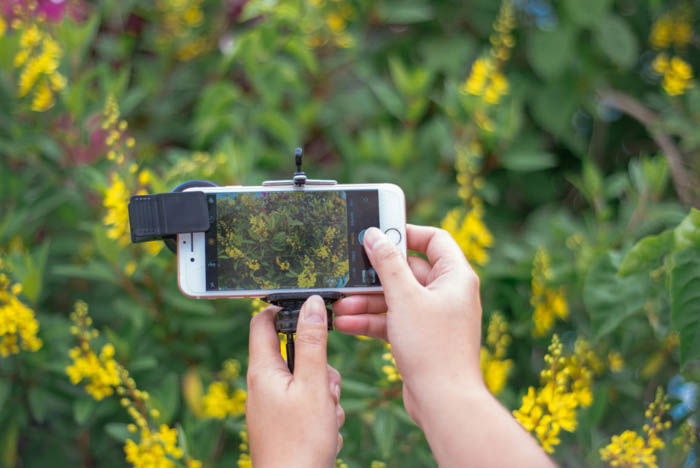
7. Minimize Movement
Due to the limited depth of field, small movements can easily throw your image out of focus. To avoid this issue, you need to keep your phone as stable as possible.
Since your device isn’t exactly ergonomic, you can create a simple rig to make it easier to hold. Simply clip on a tripod adaptor to your phone, attach a mini tripod to it, and you’re ready to shoot!
You can use the mini tripod as a handle to help reduce the movement made with your hands. Of course, you can also place it on a flat surface and take photos without having to hold your phone physically.
To make shooting easier, you can also use your earphones as a “remote trigger.” Attach it to your phone, and you can use the volume button to take photos.
That way, you don’t have to fumble with the screen and create unnecessary movement.
Try your best to avoid shooting on a windy day as well. When you’re photographing plants, you’ll find it very difficult to achieve focus when they’re moving in the breeze.
Wait for a calm day so you don’t have to worry about keeping your subjects still.
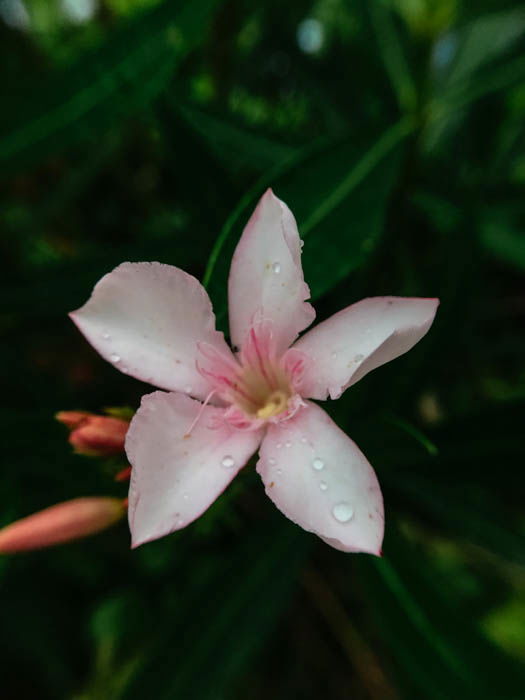
6. Use the Grid Lines for Perfect Composition
The rule of thirds is one of the easiest ways to achieve proper composition. It requires dividing an image into nine equal squares. To create a well-composed picture, put your main subject exactly where the lines intersect.
If you’re having trouble imagining the squares, you can turn on your phone’s grid line feature to divide the frame for you.

The grid lines are useful for composing your macro shots, especially when you’re photographing plants and flowers. These are difficult to shoot because they often appear in clusters and, unfortunately, you can’t rearrange them.
Remember that knowing where to place the flowers in the frame will separate your work from the rest. To create a balanced image, you have to look for a sweet spot where your main subject is directly in one of the intersections.

5. Shoot Several Photos to Capture the Right Moment
As we mentioned, keeping your subject sharp can be an issue when you’re taking macro photos. Since your macro lens blurs everything beyond its working distance, even the best phone camera will have a hard time focusing.
Even when the distance between you and the subject is correct, a small breeze could still throw it out of focus. Therefore, to increase your chances of getting the sharpest shot, make sure you take a sequence of photos.
Next, check your gallery to see if you got the shot you wanted. This practice is called chimping and is sometimes frowned upon. But due to the nature of macro smartphone photography, you have to do it to make sure your images are in focus.
In fact, you should even zoom in to check if your focus is indeed where you want it to be. If you see that some regions of your subject look blurry, take another photo.
Since you’re dealing with stationary objects, you can photograph them so many times without fear of missing the right moment.
4. Experiment With Different Angles
When most people take macro photographs, they usually just take photos from above. It’s the most natural angle for many since the objects they shoot are small and below eye level.
However, that doesn’t mean that’s the only perspective you should try. You can always take photos from the side, from a 45-degree angle, or even from below. Try various shots that offer variety.
People encounter overhead pictures of flowers all the time. Offer them something that they don’t see every day.
What’s excellent about cell phone photography is that its portability allows you to try shooting from different angles efficiently. You can even snap photos of the flower bed without damaging plants with bulky equipment.
3. Edit Your Shots
What makes your phone perfect for photography is that you don’t have to export your images to edit them. All you have to do is open your photo editor and process your pictures on your device.
You can always use your phone’s native photo editing app to retouch your images. However, if you want more creative and technical control, it would be better to upload a third-party app.
The most popular ones are VSCO Cam and Adobe. VSCO Cam offers a lot of free presets that you can apply to your image with a single tap.
It’s easy to use and it offers better choices than Instagram’s editor. It also has editing tools that control exposure, contrast, sharpness, and temperature.
If you can’t find the presets you want, you can also buy new ones within the app for about two dollars each. Meanwhile, Adobe has two apps you can use—Photoshop Express and Lightroom CC.
You can mostly use them for free, but you’ll need to upgrade if you want to use some of their more advanced tools such as selective adjustments for Lightroom.
If you want to edit your images quickly, then you can use Lightroom CC. Its interface is simple and has all the tools you need conveniently placed at the bottom of the screen.
This particular app allows you to pick presets, sharpen an image, and change color temperature, among other features. For extensive photo editing, you’ll need the Express.
Apart from providing you with essential editing tools, it also allows you to do anything from removing blemishes to creating collages.
2. Try Shooting Indoors
One of the best benefits of iPhone macro photography is that you can do it anywhere. When you don’t have the time to go outdoors, you can always shoot macro inside.
However, since shooting indoors has its own set of challenges, you also have to approach it differently.
No matter where you are, natural light looks better than artificial light. Therefore, you should always choose ambient light coming from outside if you have the option.
When you’re taking photos inside, try to stay close to the windows and let the sunlight illuminate your subject.
If you have to work with artificial light, use a small lamp instead of overhead lighting. Since it has a more focused beam, you can easily direct it towards your subject.
To diffuse the brightness, you can tape some parchment paper (or even a paper napkin) on the lampshade. As a result, the light on the object you’re shooting will look softer and more balanced.
 If the room you’re shooting in looks messy, you can use makeshift backdrops as well. Since you’re photographing small objects, you’re not going to need a big background.
A small piece of white or black cardboard often works perfectly. It’s a simple solution that can enhance the production value of your photos.
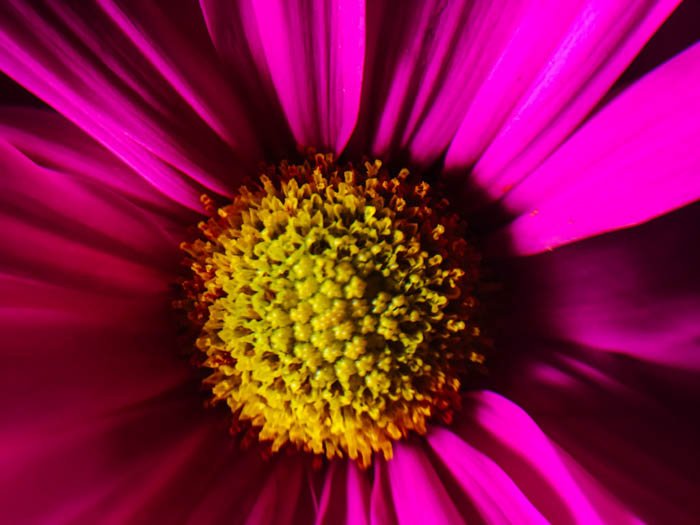
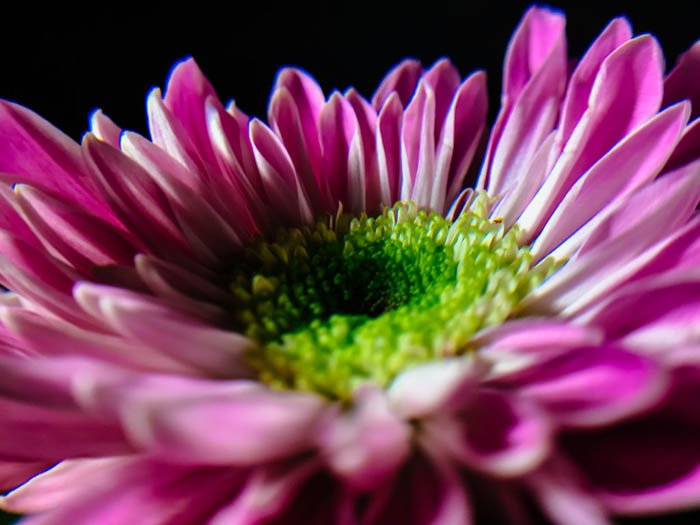
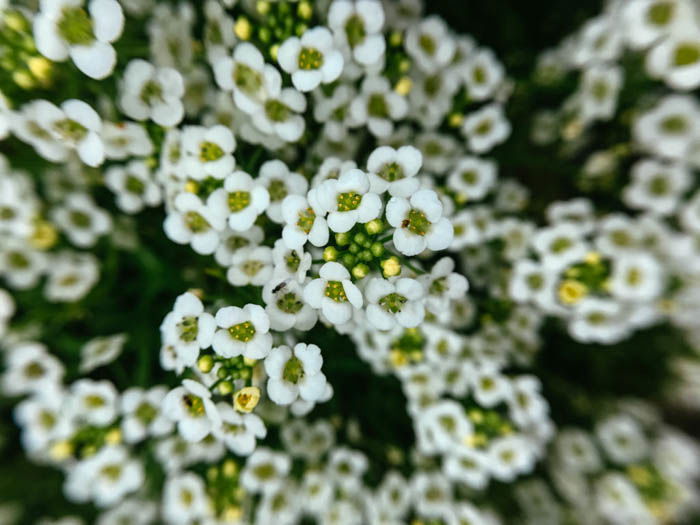
1. Take Photos of Everything
Just because you see macro photos of flowers a lot doesn’t mean that they’re all you can photograph. Macro photography is ultimately about experimentation.
You’re free to take pictures of absolutely anything you fancy and just have fun with it.
If you don’t know what other subjects to photographs, here are a few suggestions for you.
Small Insects
Apart from flowers, insects are very popular subjects as well. If you happen upon an insect on a flower, even better!
Eyes
You probably don’t know this, but you can also take extreme close up photos of people’s eyes. With the macro lens, you’ll see the beautiful patterns in their iris.
When you photograph eyes, remember to be in a well-lit area so you can properly photograph their details.
Jewels
Gems (even artificial ones) have beautiful patterns when you look through them. When you take photos of them with a macro lens, you’ll start to understand why they can be mesmerizing.
Every angle looks different, so you’ll never get bored shooting them.
Food
If you’re also into food photography, then a macro lens would definitely be handy. Macro photography is a great way to present dishes uniquely.
Furthermore, when people see the ingredients up close, they’re more inclined to eat them.
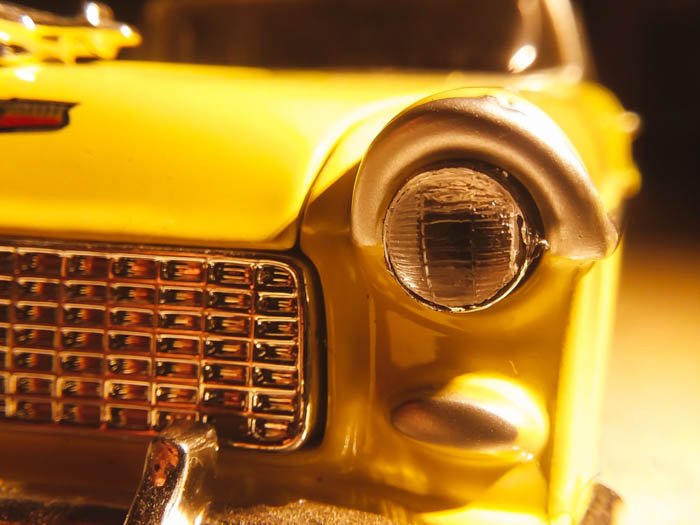
Everyday Objects
Any object you see around your house can be a good subject for macros. Most people like taking photos of coins and even toys.
Just about anything that features patterns and beautiful colors will make pretty pictures.

Conclusion
iPhone photography has long established itself as a respectable creative platform. Now that their camera resolution is higher than ever, the quality of the images has gone up significantly as well.
It goes to show that you don’t need expensive equipment to produce beautiful images.
Furthermore, it feels good to know that you don’t need to bring a bag full of gadgets to take photos. With your phone and a clip-on lens, it’s easier than ever to shoot iPhone macro photography.
Check out our Macro Magic course to master macro photography!