Do you ever get curious about how photographers share their photos on the internet? Well, it’s not a simple process of just uploading them.
We’ll show you how to share photos online like a real professional!
Share Photos: Use the Right Color Profile for Online Images
This is probably the most commonly overlooked part of sharing photos on the internet. Only a few people realise what a difference it makes.
The format you choose affects the overall color and saturation of your photos. It even changes the contrast in some cases.
The correct profile for sharing photos on the internet is “sRGB.” Not to be confused with “RGB” or “RGB generic.”
I’ll show you the differences later on. For now, let’s look at how to export your images using the right color profile.
In most editing suites, you’ll find an option to ‘Export for web.’ The name is pretty straightforward, and that’s helpful in ensuring you’re using the correct color profile. It’s just a case of finding out how to do it on your particular software.
I set everything to sRGB except for ‘Export original size’ since I use the latter to export for print.
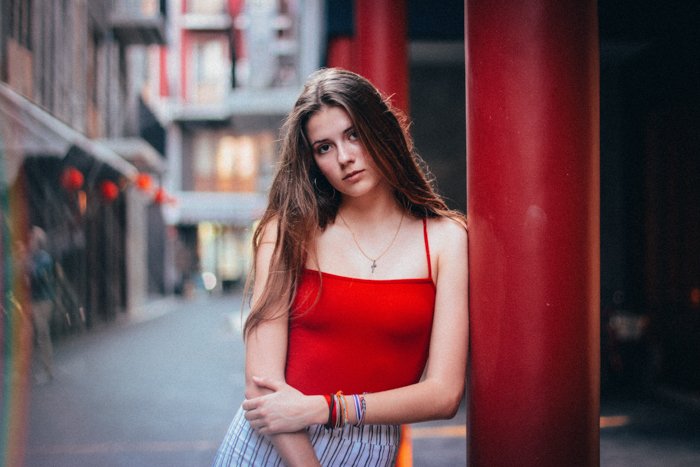
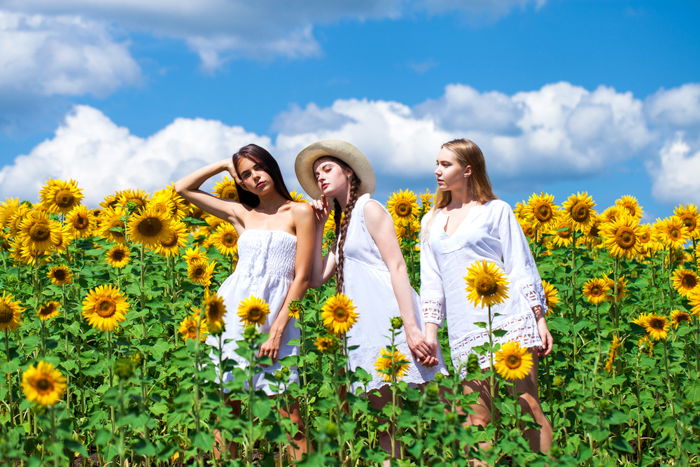
Now, let’s have a look at the different color profiles and their effects on the original color of one of my photos. The first of the three is the correct color profile at sRGB.
As you can see, this is precisely how I would want it to look.
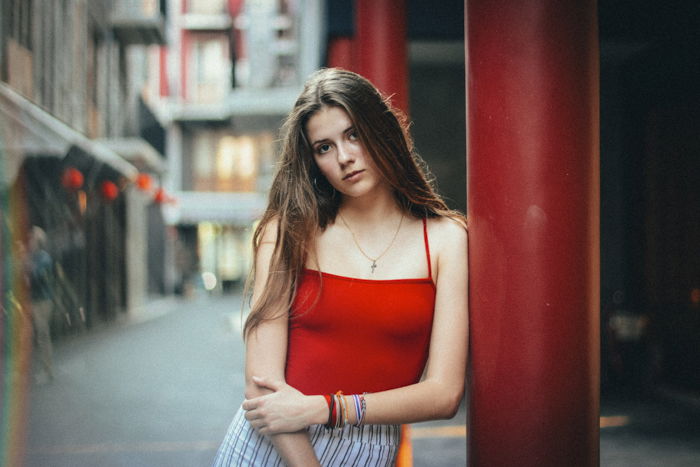
The RGB version, which is the second photo has the most drastic difference. As you can see, it changed the tone of the picture. The skin looks almost green in comparison.
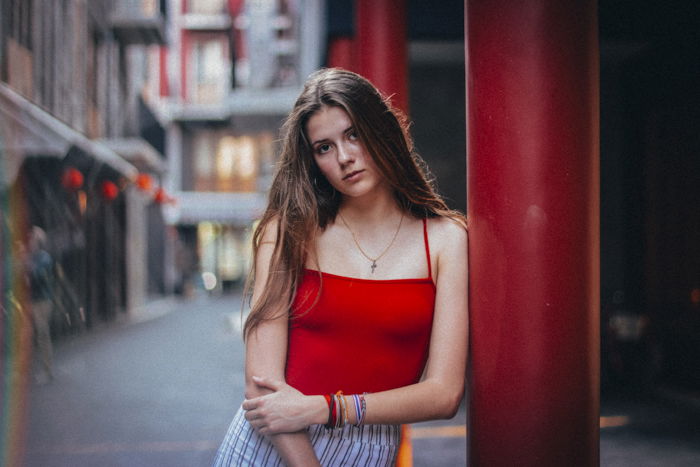
The third and final photo shows less of a difference. But the contrast of the image made the skin tones darker.
What’s interesting is if you were to save these photos back to your desktop, they would no longer appear different. They would all look like the sRGB profile again.
Set the Export Size for Best Quality
Export size is crucial to the quality of your images when uploading them on the internet. Your software will be far better at resizing images than any website with minimal resources in comparison.
I use about 8-10 different presets regularly for sharing photos to different locations. It ensures that I have each photo at precisely the right size and in the best quality. It also helps me avoid wasting space on my hard drive storing duplicates of pictures that are unnecessarily large.
You may not think the export size is as important as I’m making it sound. I encourage you to have a look at the image slideshow below the next paragraph. See for yourself.
The first photo is a crop of the full-sized image that didn’t go on the internet.

Second is an image I exported to Facebook to fit within the 720*720 pixels allowed by the site.
I then cropped this image and enlarged it to be the same size as the original crop at 720*720px, hence the poor quality.
The final image of the three came from submitting the photo in its original size to Facebook. I didn’t have to do anything since the site did the resizing for me.
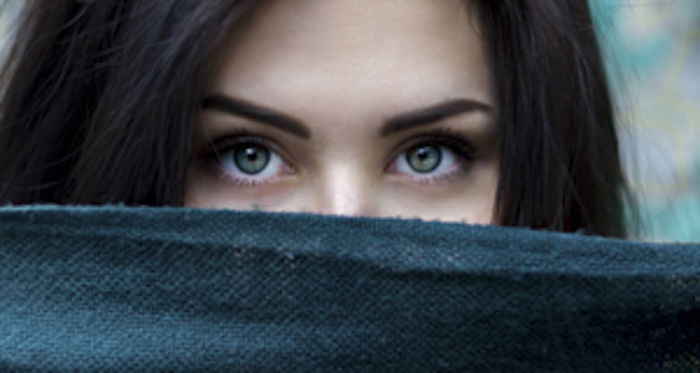
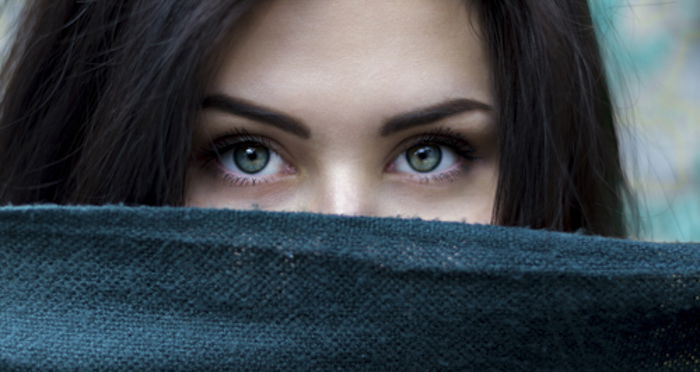
The first image doesn’t count for much of a base for comparison. It’s the second two that show the difference that export size can make.
Most noticeable are the sharpness and detail in the eyes.
So don’t allow your photos to look sub-par. Find out the size you want them and set up presets accordingly.
Find the Correct Sharpness for Your Image
Whenever you resize an image, you’re pushing pixels together in places. This process invariably leads to softer photos. It’s hard for a computer program to distinguish what’s right.
The best way to replace the sharpening lost during resizing is to add some more sharpening to the image once you’ve resized it.
There are two main ways to do this, depending on the software that you use.
Firstly, if you use a program like Lightroom, you can apply sharpening on the export of your photos as the very final step. But understanding exactly how to apply it to a group of photos is a bit like black magic. In other words, it’s challenging to pull off.
The second way is to export all of the photos you want. Then I re-import them, adding sharpening to them individually.
The second option is always going to be more accurate. I use it a lot less because it’s very time consuming and you need an organised workflow to make it work.
Either way, if it’s a photo you’re proud of and want to share, this step is essential.
Have a look at the slideshow below. Of the two images, the first is the original export of a photo.
The second is the same photo re-imported after being resized, sharpened, and then exported again.

The changes are subtle. But if you look closely, you now see more detail on the hair.
Learn more about how to resize images in Lightroom and Photoshop.
Watermark Images to Protect Them
Watermarking is a tricky one. You have to weigh up how much you want to protect your image against how much of a distraction you’re willing to add to your photos.
You’ll notice that nearly all of the photos on this website lack a watermark. The same goes for my Facebook. For the most part, it’s because it’s distracting and ruins how people experience the image. Besides, the quality of Facebook photos is too low that people who may want to steal them can’t use them anyway.
On the other hand, I watermark every photo for my portfolio. Why? Because they’re much bigger and more useful to anybody wanting to steal them.
Just remember that placing a watermark has positive and negative consequences:
- Positive – If people steal my picture and crop the watermark out, I can slap them with a fat invoice for blatantly taking my work.
- Negative – It detracts from the image. Also, if someone were to steal it and crop the watermark out, image searches like TinEye won’t find it. Unfortunately, it only detects the exact photo you input, but not a cropped variation.
Overall, I think watermarking is crucial. You’ll find this true even more so if the content of your photo is worth a lot of the money.
If you’re only going to be putting a small portion of your portfolio on the internet, it’s not so important. But just remember that every time you make your work available online, you make them much easier to steal.
So think twice about what you put online.

Only Use the Best Quality Images
I see this all the time on Facebook. I often find a few good photos dispersed amongst a load of rubbish. You can’t even tell what’s right anymore.
Remember when sharing photos that your album as a whole is only as strong as your weakest photos. If you’re going to include all of your poorly exposed duds, you won’t go far.
I’m well past taking poorly exposed or out of focus photos. But I still make sure that the variety of shots I make public offer interest to the reader. I don’t just upload five pictures of the same person doing precisely the same thing.
If you leave the viewer impressed and wanting more, you’re on to a good thing.
Conclusion
Remember that the quality of your photos reflects a lot about you as a photographer. So take your time when processing your pictures before you post them online.
If your pictures look terrible, don’t bother posting them. If your potential clients find them online, they might think you don’t have what it takes to work with them. Make sure you only share the ones that represent your skills.
Want to learn more about how to become an expert in managing your social media? Why not check out our ebook Social Success Strategies next!
![]()
![]()
![]()
![]()